WEB Fundamentals
WDD 130
W01: Editor Installation
Overview
- Task: Set up your Canvas profile picture and VSCode editor.
- Purpose: Prepare a place to create your website with a code editor.
Background
One of our goals for this class is to allow you to create a real website accessible with a browser. This, as you will discover in the readings and videos for this week, requires you to have what is known as a host. Most hosts cost money, but not all. For this class, we will be using a free service called GitHub Pages. We will create our pages using the Microsoft Visual Studio Code editor and upload our files to GitHub. Then from there they can be seen on GitHub Pages. We can then share the website with an instructor or fellow student for collaboration.
There are a number steps we will need to go through to get everything set up. This week we will only be installing VSCode with some extensions and next week we will finish with the Git, GitHub, and GitHub Pages steps.
Preparation for those needing File Management Review:
The way our files are organized in this course and the way we refer to files in our code can be confusing to beginning students. Especially if they are beginners with file managment concepts.
If this describes you, please watch these videos:
File Management using WindowsFile Management using a Mac
File Pathways
Instructions
-
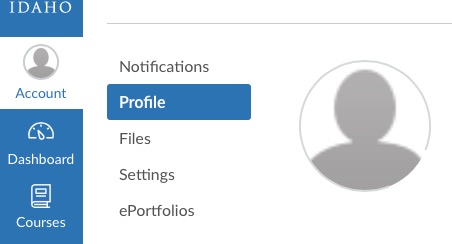
Canvas Profile
In your Canvas profile, add a picture that has a close up of your face by doing the following:
- Select on the Account button located at the top left corner of the page.
- Select the option titled Profile and then the button Edit Profile.
- Select directly on the placeholder image and either take a picture or upload a picture of yourself from your computer.
- Save your changes and close the window.
NOTE: This is the image that others will see when you post on the discussion board.
-
Installing Visual Studio Code Editor
Visit the Visual Studio Code website and then watch the following video to step you through the install process. There are two videos, one for Windows and one for Mac. Choose the video that corresponds with your operating system.
See your instructor if you have any trouble installing VSCode.
After installing VSCode, you are welcome to set your interface preferences. This video, even though it ends abruptly, covers a very brief intro to VSCode and shows how you can edit your interface preferences.
Additionally, if you want to know more about keyboard shortcuts for VSCode, here are some links to learn more about them:
-
File Management with Visual Studio Code
The following video talks about File Management and how we can start a web project's file structure using VSCode.
Follow along with this video carefully to create a wdd130 folder with the structure of your aboutme project inside of it.
⚠ When naming folders and files:
Use all lowercase, no capitals and also no spaces.
-
Creating an HTML page and installing VSCode extensions.
The following video demonstrates how to create an HTML file on VSCode and installing an extension on VSCode.
In order to use Visual Studio Code to create web pages, there is a helpful extension we will use:
- Live Server is used to display our web page in the web browser. Using this extension will allow us to see what our page looks like without uploading it to a web server.
- Prettier is also an optional extension you might find useful to make sure the code stays nice and neat. It helps us to properly format our HTML and CSS code so it is easier to read and maintain.
The following video demonstrates how to create an HTML file using VSCode and shows how to install the Live Server extension in VSCode.
-
Become familiar with VSCode
If you'd like to explore the VSCode environment in more detail, visit the Microsoft documentation on VSCode at docs.microsoft.com
One nice feature is to turn on the word-wrap feature by selecting the View menu option and checking the Word Wrap' checkbox.
- Wireframe.cc Lightweight online tool for creating wireframes, or
- Coolors.co A color theme chooser
Other Software
Here is a list of other software we will use this semester. These are all web-based and require no installation. Your instructor will give you more details when it is time to use them: